I may be a little late to this party but I’ve recently discovered the wonders of chalk paint. I sort of fell into it after I had purchased a vintage chair that needed a little zhush. I didn’t have time to have it reupholstered because I wanted to use it for a party I was hosting at my home later that week. Thankfully, the shop where I purchased the chair also sells Annie Sloan’s Chalk Paint and with a little convincing from the shop’s owner Amanda, I happily went home with a can of Paris Grey. Amanda explained that this fabric was going to be a little more challenging than say linen or cotton because of its nap. She reassured me that it could be done, but the effect would be different and it was going to take a little more patience and tenacity to get the final result. I wasn’t really up for such an extensive project (because of the event I was trying to plan) but I wanted to get this piece done for the party. So in between feedings and at nap time (the kid’s nap times that is) I went to painting. Thankfully the weather was cooperating and I was able to get most of it done outside and I enjoyed the sunshine.
And so it began my adventure into Chalk Paint. I set the chair outside and got to spraying down the fabric with water. It seems counter intuitive to spray fabric with water but that’s the thing with Chalk Paint, you have to spray down the fabric with water so that the paint can absorb into the fabric. In my case, with this crazy velvety fabric, I had to pretty much soak it. Yikes. Then came layering the paint on. The trick to this was to do thin layers of paint and let them dry in between. Water, light coat of paint and set it to dry. Water, light coat of paint and set it to dry. I did this about 5 times and finally achieved the color and look I wanted. The paint does dry pretty fast so that I was able to get a couple of coats down within a few days. This whole thing was pretty simple actually and not as frightening as I had thought. It really just took some patience. Not sure, but I must have had some patience stashed somewhere because with a toddler who’s learning to assert his indepence lately, patience hasn’t been plentiful.
Now… behold the before.

And now after:

I knew from the beginning that I wanted to keep the wood frame the original color- although I do think it would be really pretty painted the same color as the fabric. But there she is. I took this picture after styling it in my yard for the party (more on that to come later this month).
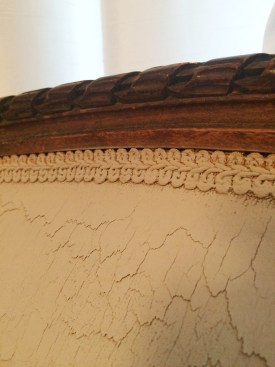
To be honest, the biggest pain in the ass was painting the trim. I couldn’t really tape off the wood with painter’s tape because of the curved lines of the frame. So I did my best to try to not lose my shit while painting the trim and getting paint on the wood. A simple swipe with a wet paper towel (or baby wipe) got the paint right off. Not the end of the world.

All in all I’m happy with the result. Even with its crackliness it is way better than it was with its sad saffron color it once wore. I still have to add the layer of wax that’s recommended- maybe I’ll get to that today… maybe.


[…] This post by Mary at ilikeitlovely – I did not know you could paint upholstery with chalk paint (in fact, I’ve never […]